Canning with Ashley
Tis’ the season for gardening to our little hearts’ content, and for me, that also means preserving foods and making the most of the life cycles of what I grow or buy. Saving veggie scraps to create nutrient rich and tailored flavor stocks (as opposed to 3-ingredient, store-bought stocks with questionable ingredients) is one of my favorite age-old sustainable kitchen practices, I’d love to take you through this process! You only need a few tools and tips to take the intimidation out of this process.
This wee we talked about the central tenants of canning and what you need so let’s break them down!

Combatting food waste
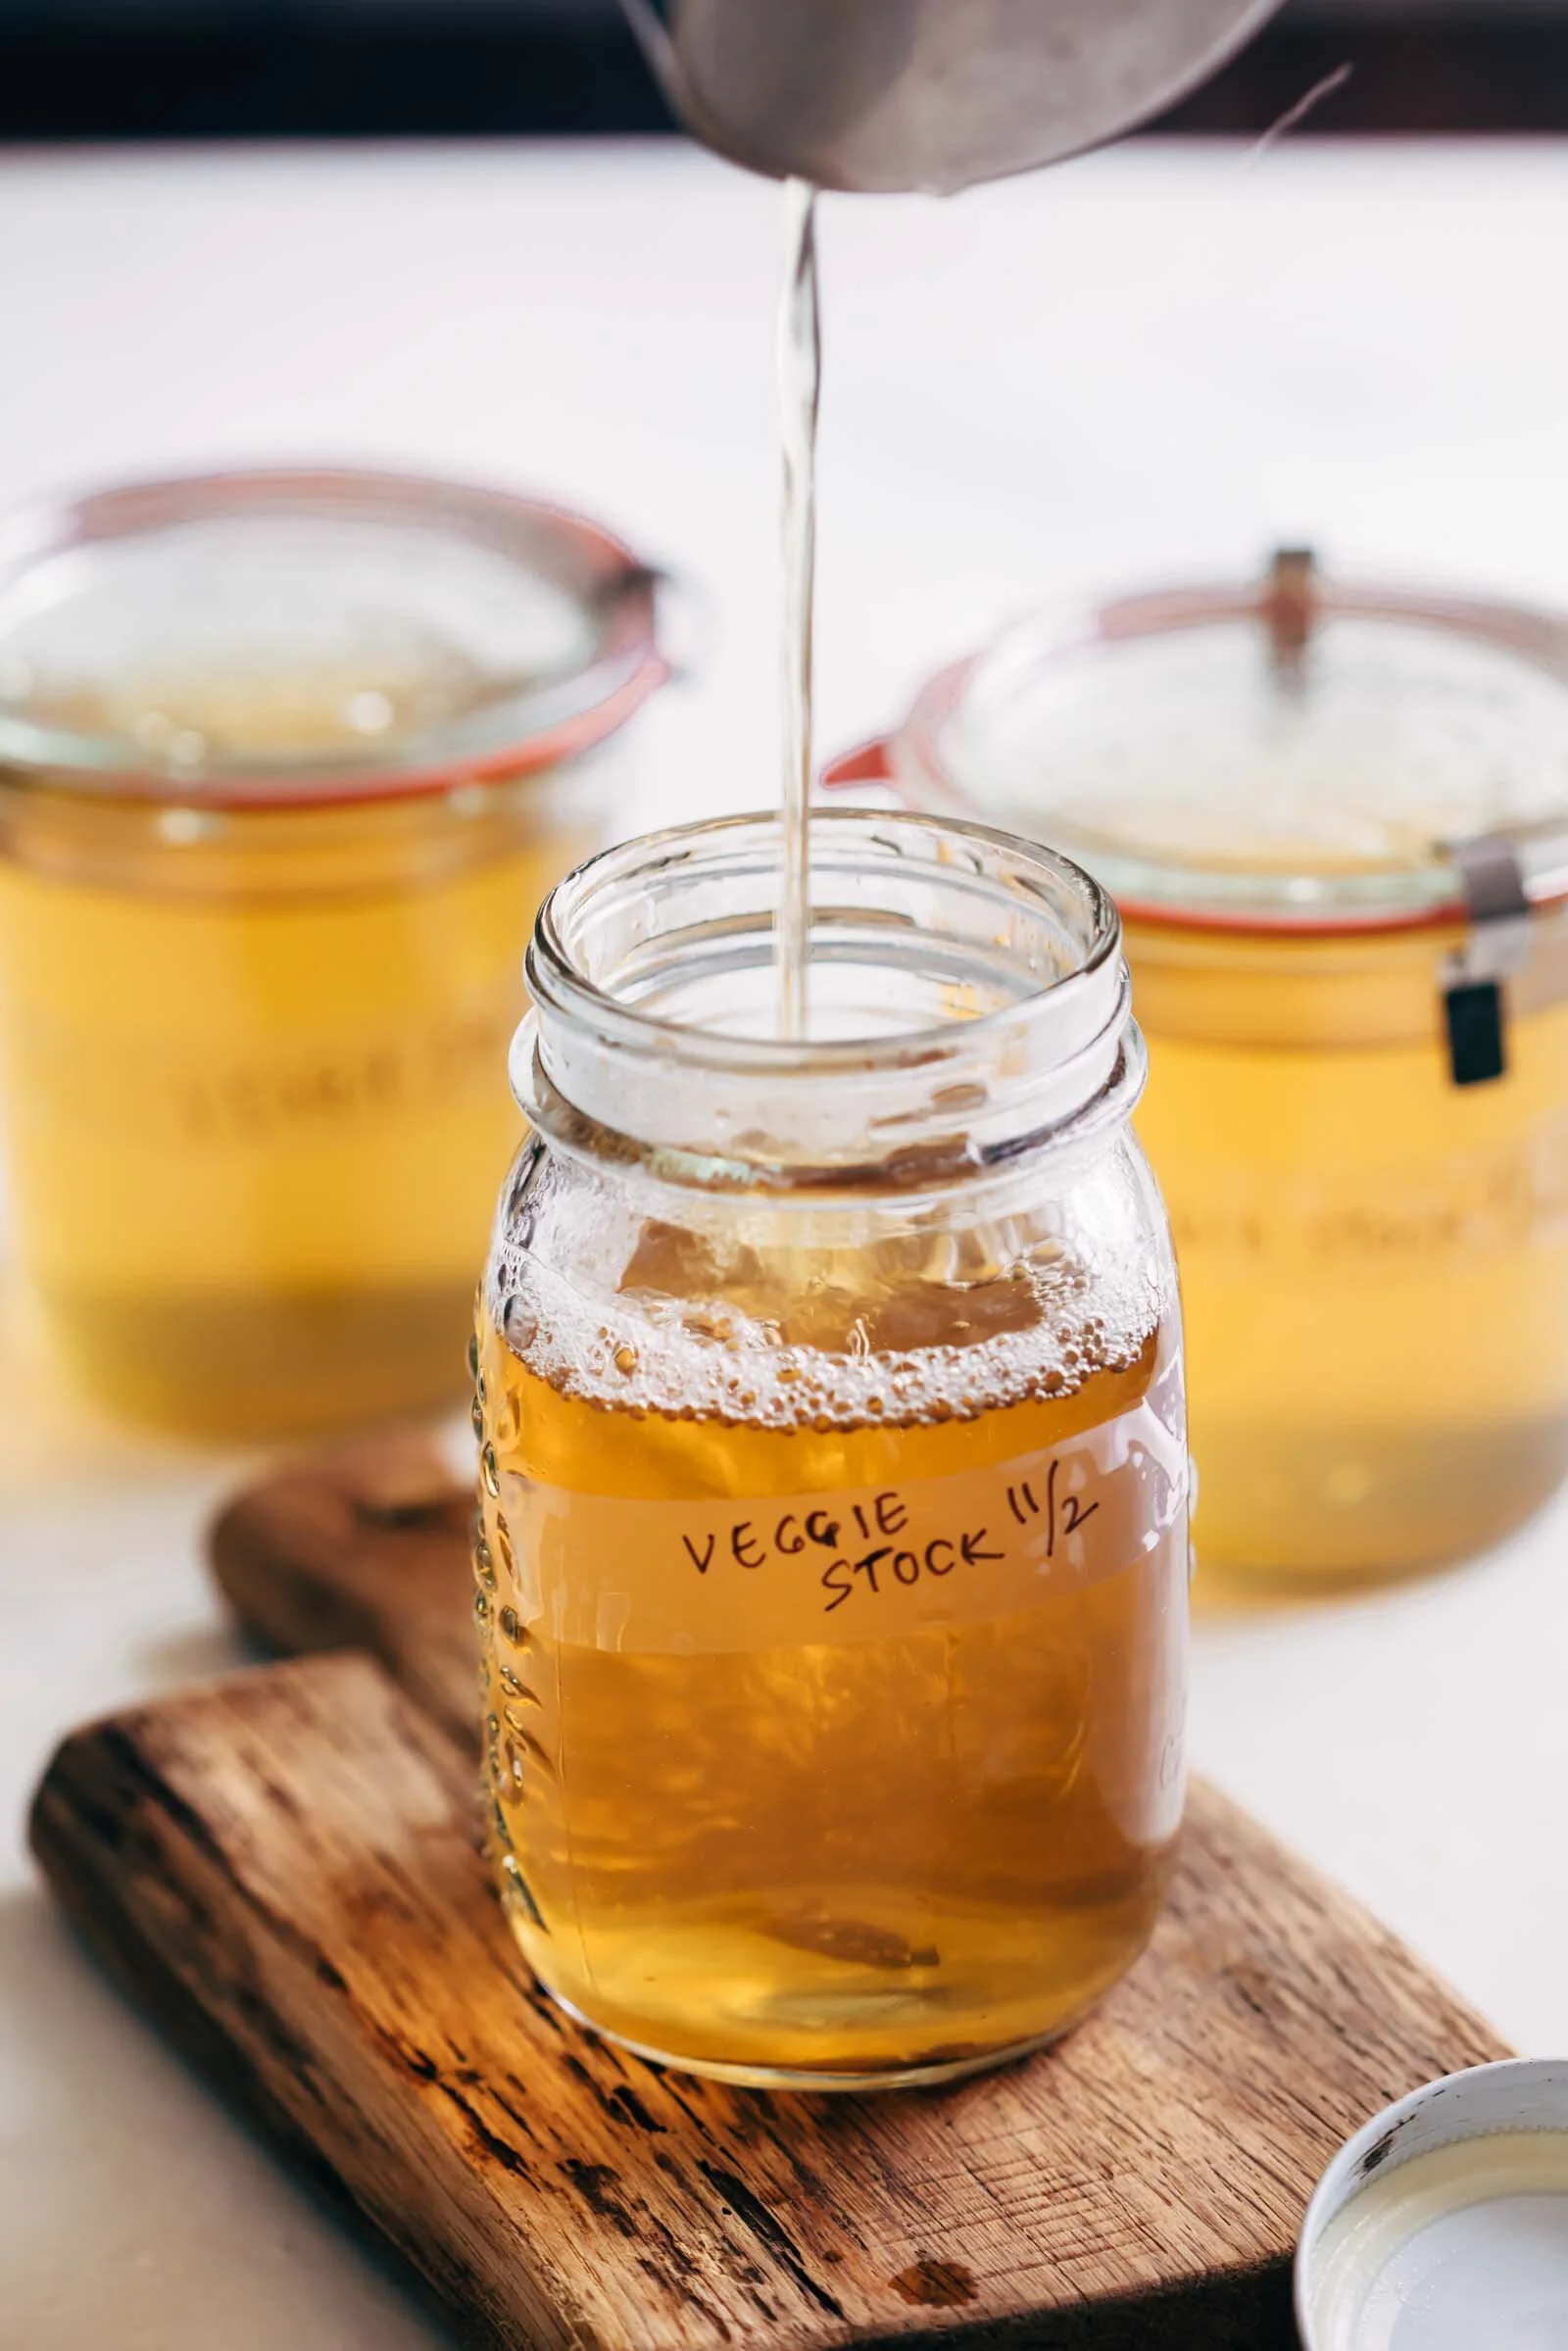
Whether you’re growing vegetables or buying them from the store, making flavorful vegetable stock to store and save for the year is the perfect way to keep your consumption low, and recycled. I save vegetables to save for stocks include potatos, carrots, herbs, mushrooms, fennel, onions, garlic, and other alliums, leek, (skins and all), peppers.
You want to stay away from bitter-smelling veggies like broccoli and other brassica-family vegetables. This list gives you a definitive view of what to use and what not to use. I love to stash my scraps in the compost after I’ve used them in the stock.

The difference between water-bath and pressure canning and when to employ either
This is incredibly important and ensures the safety of your canned goods. Homestead Dreamer wrote it perfectly:
“Water bath canning is, essentially, boiling jars with food in them. You bring the jars, lids, and contents up to the same temperature (boiling) and then remove them to cool. As the jars and contents cool, a vacuum is created and the lid seals to the jar. This keeps air, moisture, and bacteria from getting inside and ruining the food.”
Pressure canning is very similar to water bath canning, though instead of boiling the jars and contents, you are putting them under pressure. The increased pressure brings the overall temperature up higher than boiling water and processing times are longer.”
They also created this nifty guide so you know when to use it:
Water Bath Canning
Jams and Jellies
Pickled Food
Fruits and fruit juices
Salsas
Pressure Canning
Carrots
Green beans (any bean, really)
Potatoes
Peas
Anything with meat
Tools and tips to can on your own
So you really only need a few things:
Jars and sealing lids (remember from the video, do not use old lids to seal. Rings yes, lids, no)
A long set of tongs to process your jars and sanitize your jars
Canning funnel
A large stockpot to process your jars in
A smaller pot to create the stock
Cheese cloths or “soup socks” to hold veggies (optional) You can also use a strainer.
Clean dry cloths to wipe away excess moisture from rims
Large measuring cup
The Process
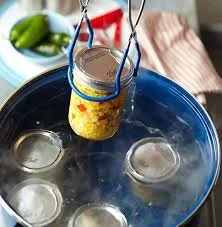
Sanitize all elements in a large stockpot of boiling water, set aside
In a separate pot, put vegetables in soup socks; fill the pot with water and boil on the stove for 20 minutes.
Once the stock is done, remove baggies of scraps or strains; Put the stock into a large measuring cup.
Place funnels on top of jars and pour the stock into jars leaving an inch of headspace at the top of the jar. Headspace is the space from the top of the liquid to the top of the jar.
Wipe the edges of the jars off and put on lids, then screw down rings.
Lower jars into boiling water; let process for 20 minutes.
Carefully remove the jars from the water and set them on a tray. Let them sit undisturbed for 12-24 hours then put away.
Don’t forget to mark the date on your jars so you now you can keep them up to a year! And lastly, don’t forget to share and have fun!
Don’t forget to watch the magic in the process over at IGTV!

